one,
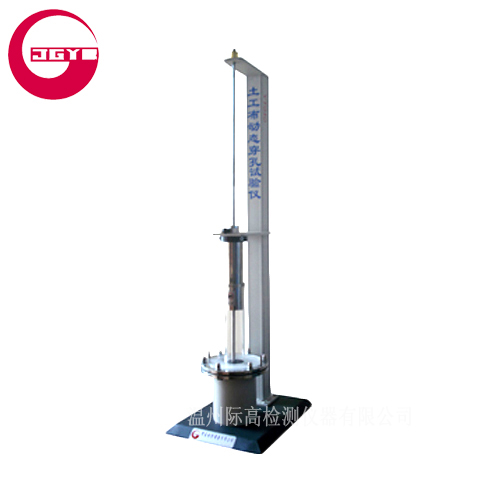
The instrument is used to determine the ability of geotextiles and their associated products to penetrate through steel cones falling from a fixed height. The degree of damage to the geotextile caused by the sharp rock falling on the surface of the geotextile is shown, and its performance is in conformity with the requirements of the instrument in GB/T17630-1998 "Dynamic perforation test of geotextiles and related products - falling cone method".
Second, the test principle
The geotextile sample is clamped horizontally in the clamping ring, the stainless steel cone of the specified mass falls from the height of 500 mm on the sample, and the hole is formed on the sample due to the falling cone piercing the sample, and then the scale is marked. A small cone is inserted into the hole to measure penetration.
Third, the main technical parameters
1, clamping ring diameter: 150 ± 0.5mm
2. Cone-to-sample distance: 500±2mm
3, stainless steel cone: maximum diameter Φ50mm
Cone angle 45°
The total mass of 1000 ± 5g
4, a small amount of cone: quality 600 ± 5g
Gradient Φ2mm/division
5, external dimensions: 435 × 575 × 1600mm
6, the weight of the instrument: 55Kg
Fourth, the instrument structure (see outline drawing)
The instrument is mainly composed of a frame, a steel cone free fall device, a clamping ring, and the like.
1. Rack: It consists of a rigid connection between the base 12, the column 10, the top plate 2 and the middle beam 4 and other devices. There are four adjustable feet 11 under the base 12, and by adjusting the foot 11, the blisters in the level bubble 13 are centered, so that the instrument can be in a horizontal state.
2. Clamping ring: The clamping ring 9 is a flanged clamping ring and is tightened by 8 bolts to clamp the sample.
3, steel cone free fall device: steel cone 5 end is connected to a guide rod 1, placed on the rack, the middle beam 4 and the top plate 2 on the rack are equipped with guide holes that do not limit the rate of decline of the steel cone, the middle beam 4 is also equipped with a locking handle 3. When the steel cone rises up to 500 mm away from the specimen, the steel cone can be locked and the handle can be pulled out. The steel cone can fall freely from a height of 500 mm to perforate the specimen. A metal shield 7 and a transparent cover 8 are also arranged under the middle beam 4. After the sample is clamped, the transparent cover 8 is pulled down, and then the handle 3 is started to pull the steel cone 5 off. After the cone is dropped, the transparent cover 8 can be pushed upwards to the shield mount 6 (the transparent cover 8 can be locked automatically) to facilitate operation.
Fifth, the operation steps
1. Place the instrument on a stable and solid foundation and adjust the instrument to level according to 4.1.
2, the steel cone 5 in the upper locking state.
3. Push on the transparent shield 8 and clamp the sample in the clamp ring 9 without wrinkles.
4, put down the transparent shield 8, pull open the locking handle 3, steel cone 5 free fall from the height of 500mm on the sample.
5. Immediately raise the steel cone 5 so that the steel cone 5 is in the state of Article 5.2, put the measuring cone into the hole under its own weight, and read the measurement data after 10 seconds.
6, the test is completed, the second test repeats 5.3 - 5.5.
Six, matters needing attention
1. For safety reasons, make sure that the steel cone is locked each time the steel cone is in the upper position.
2. In order to ensure the free fall of the steel cone, it is forbidden to have foreign matter in the guide hole.
3. Please put down the transparent shield before the steel cone falls.
4, in order to avoid damage to the steel cone, no hard objects tested.

Microchannel Condenser,Microchannel Condenser Coil,Hvac Microchannel Coils,Carrier Microchannel Condenser Coil
Suzhou Wint Electric Co., Ltd , https://www.winforthermal.com